
The next “book” in the series is the Scroll! The others in this series are: Nag Hammadi, late Coptic, limp vellum, alla rustic, and limp leather.
The scroll, while relatively easy to make, was not as easy to find information on! We relied heavily on Dartmouth’s blog: “The Historical Background of The Ancient Scroll“. We also decided that we would try our hands at a scroll tube, and this was taken from Arthur Johnson’s The Thames & Hudson Manual of Bookbinding. However, we did tweak it a bit to work better for our needs.
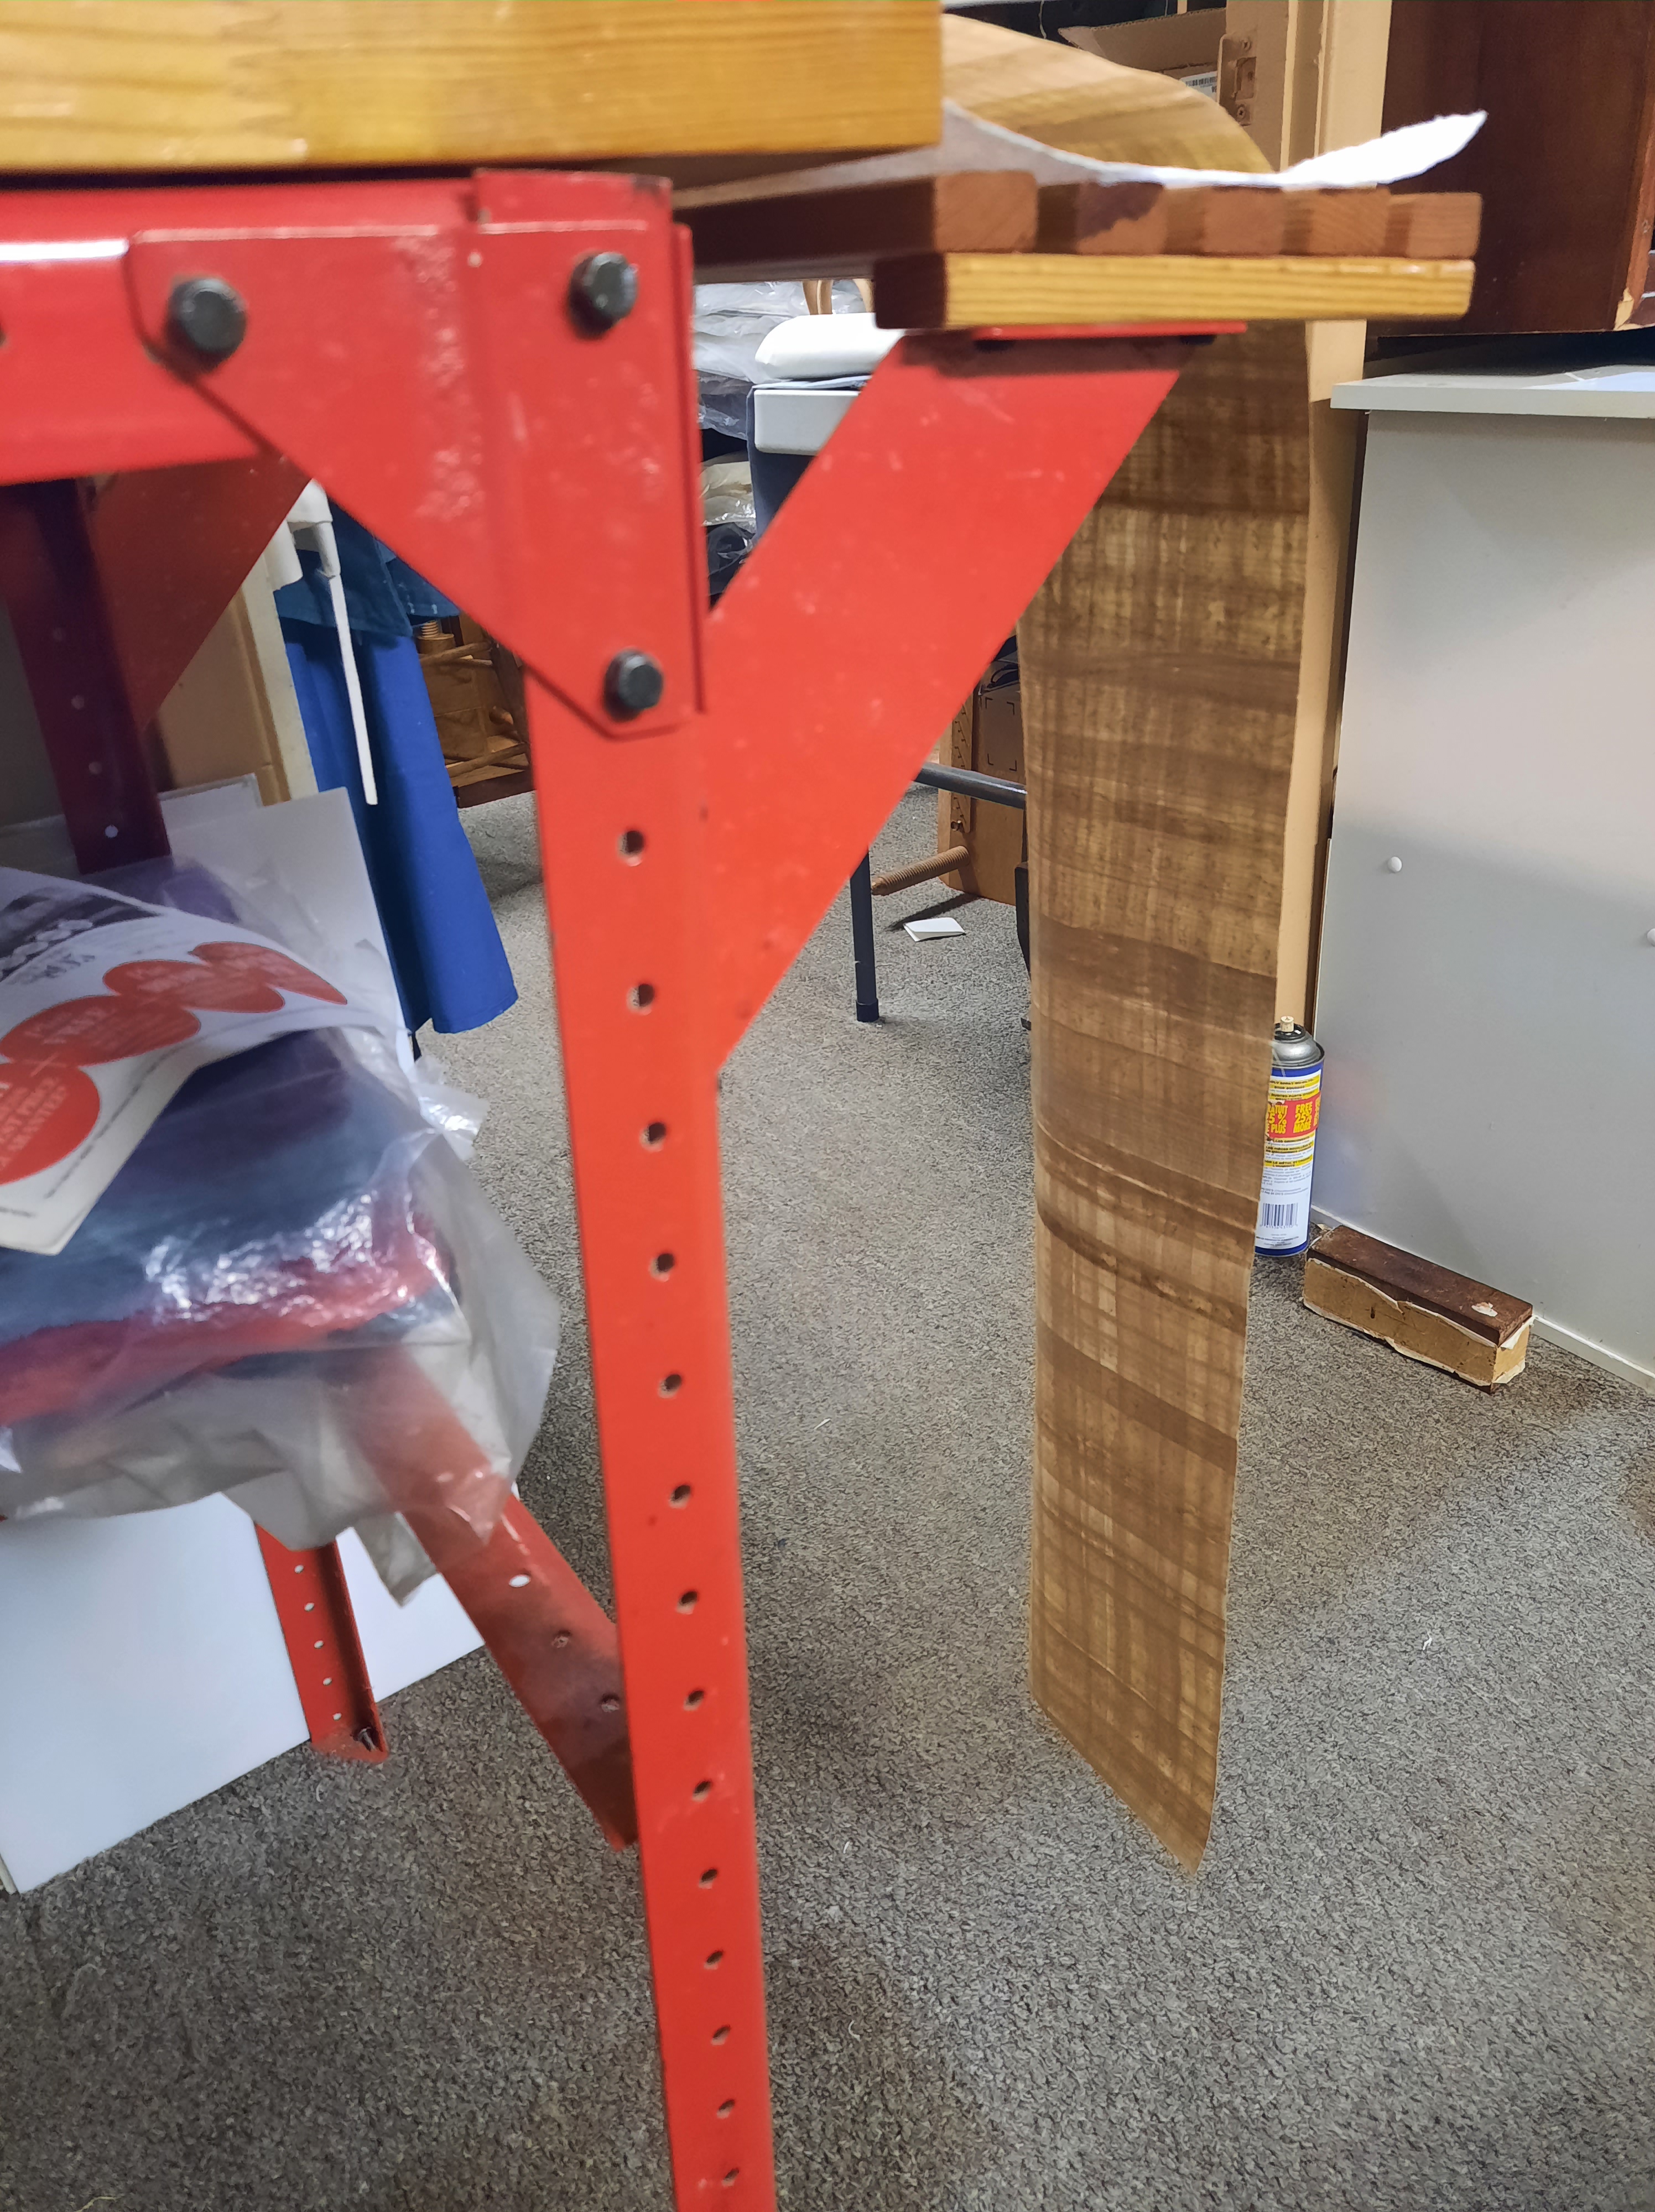
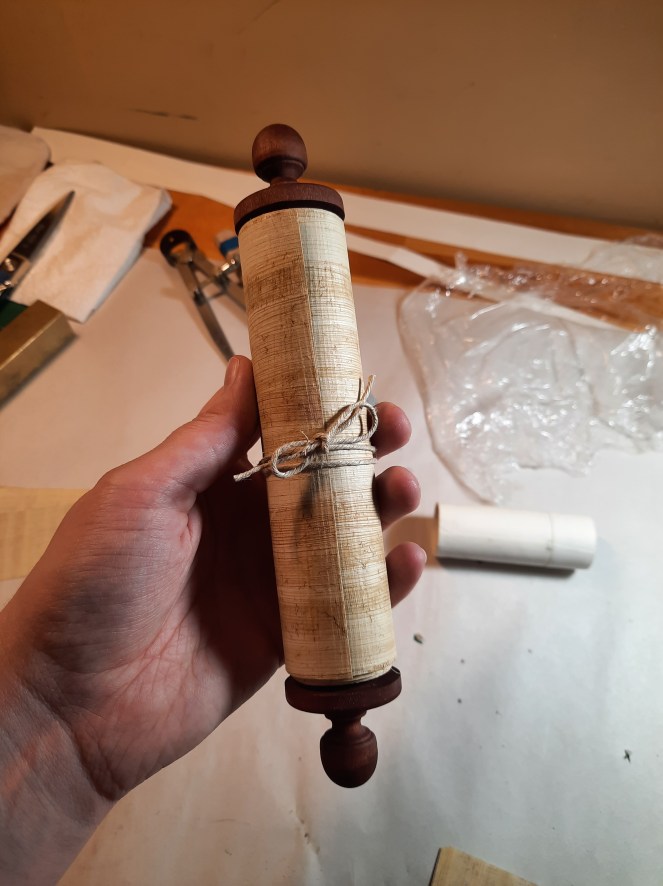
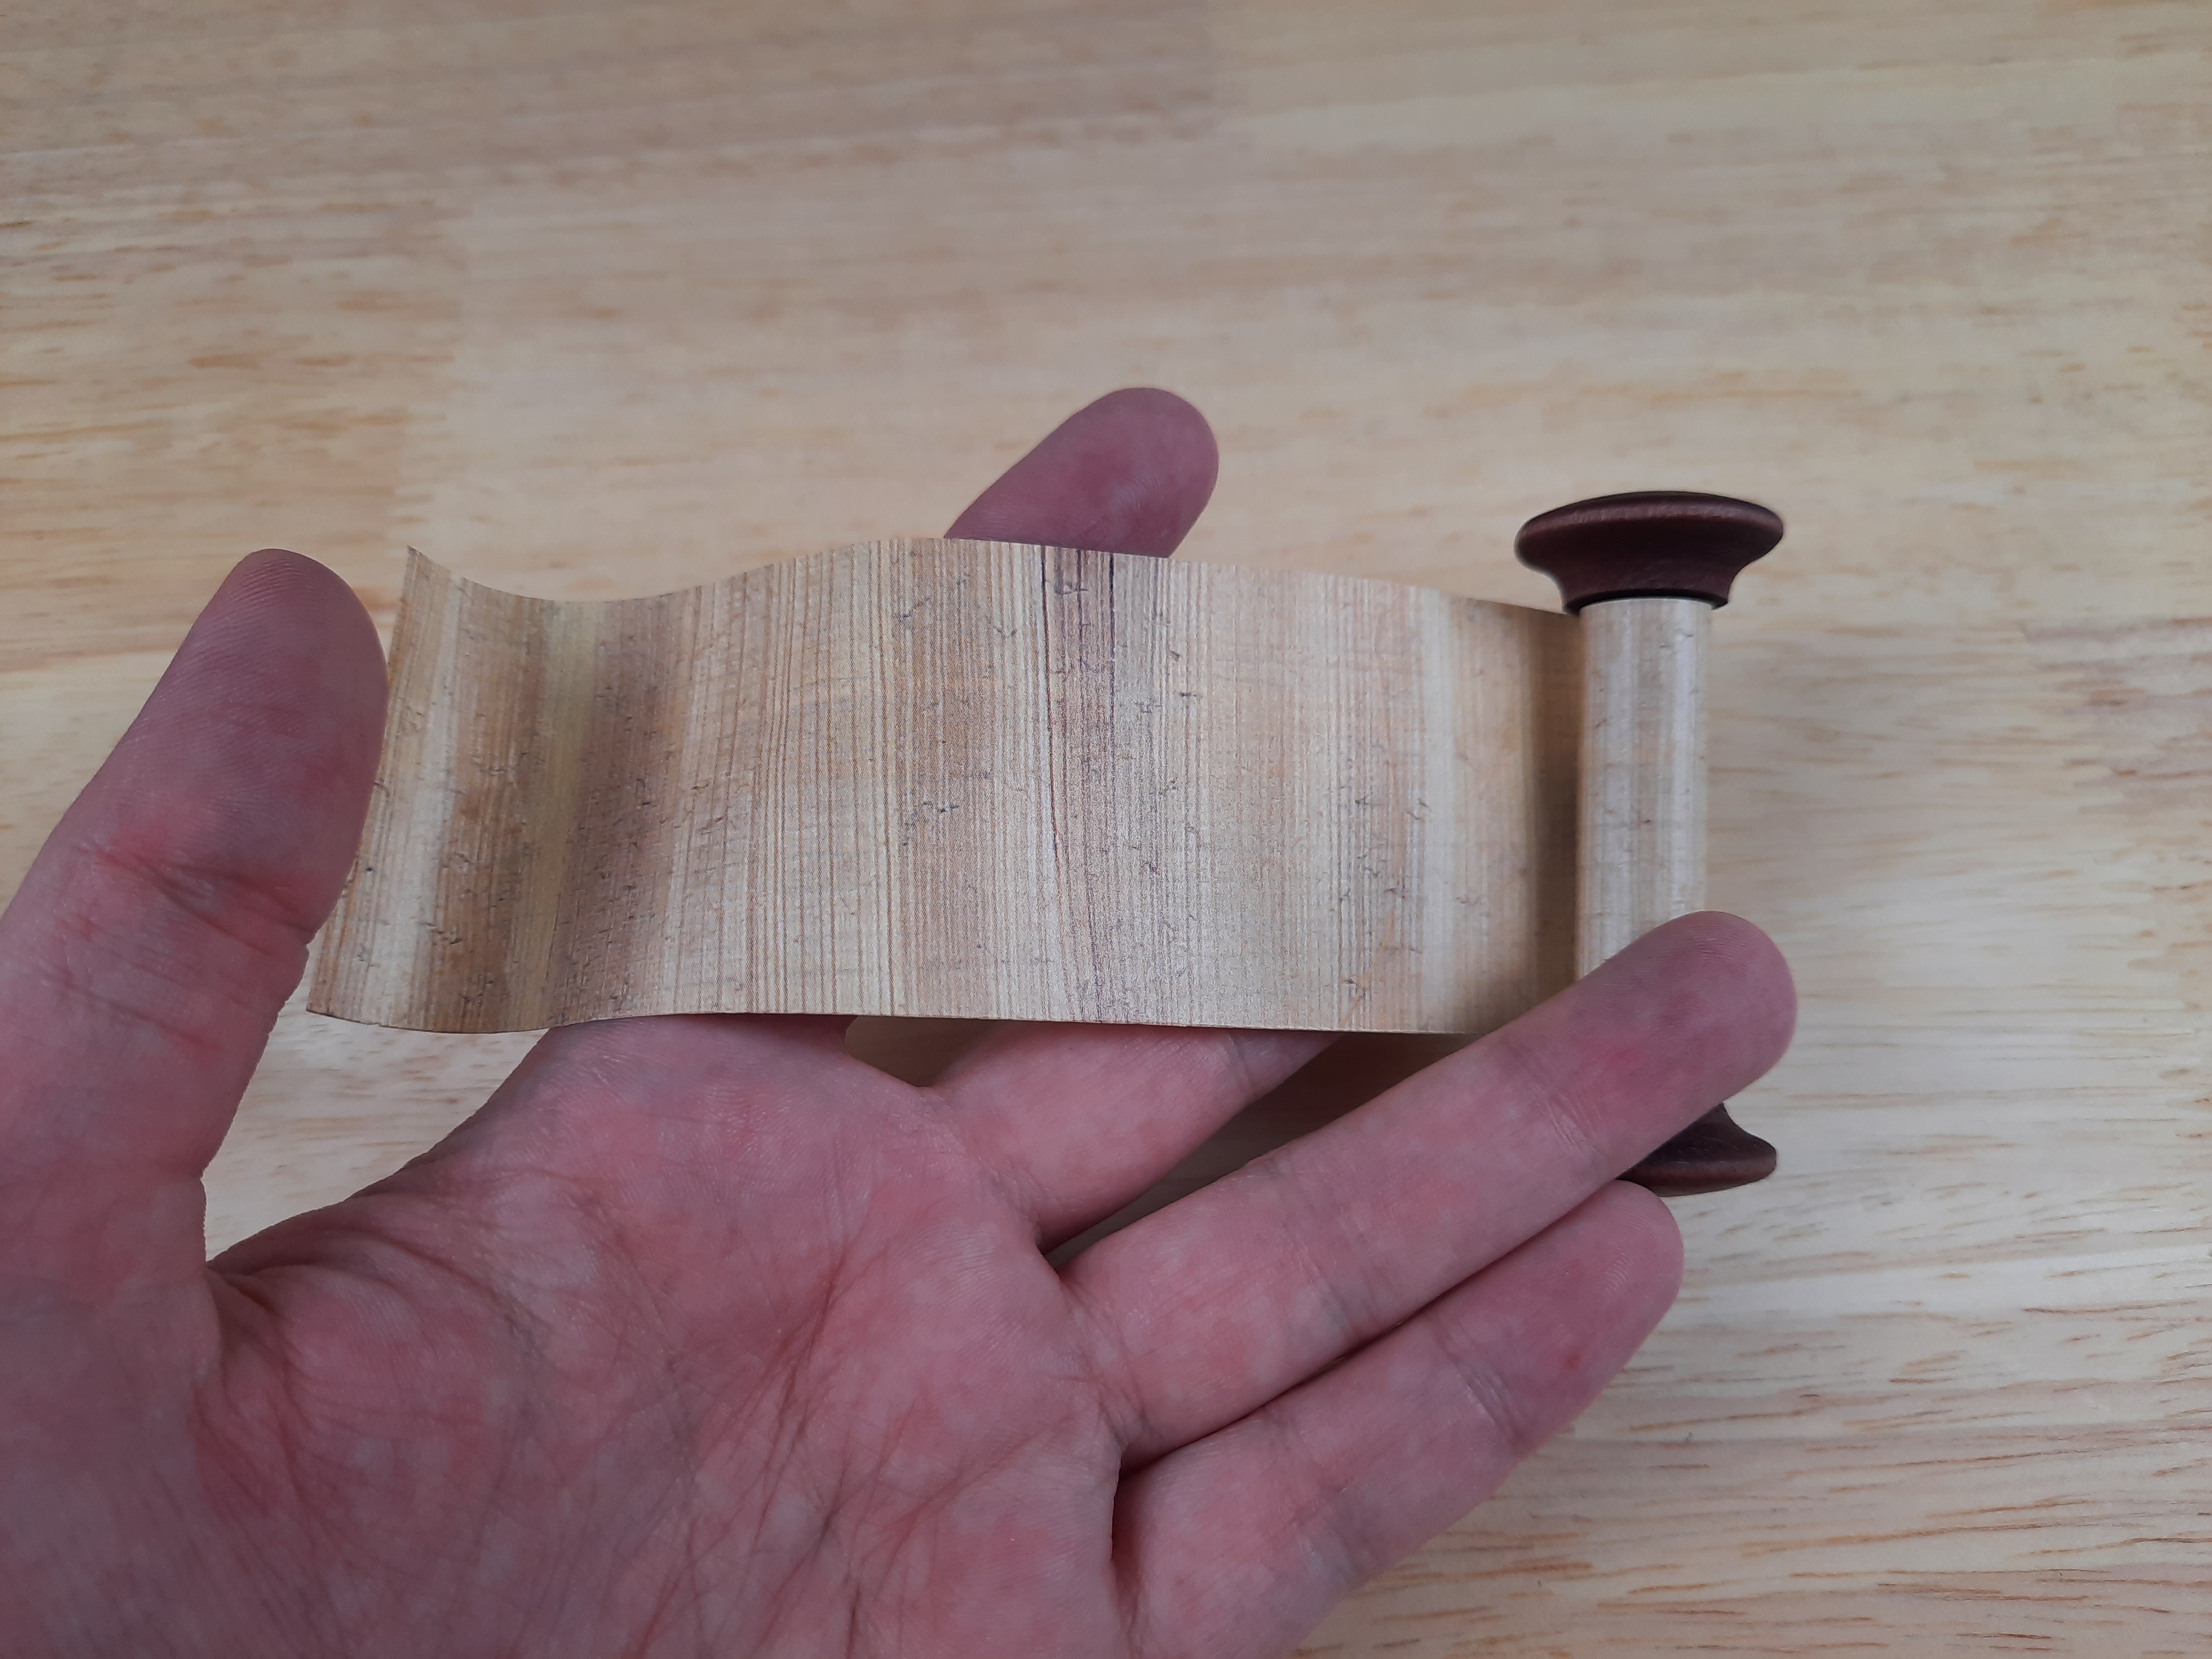
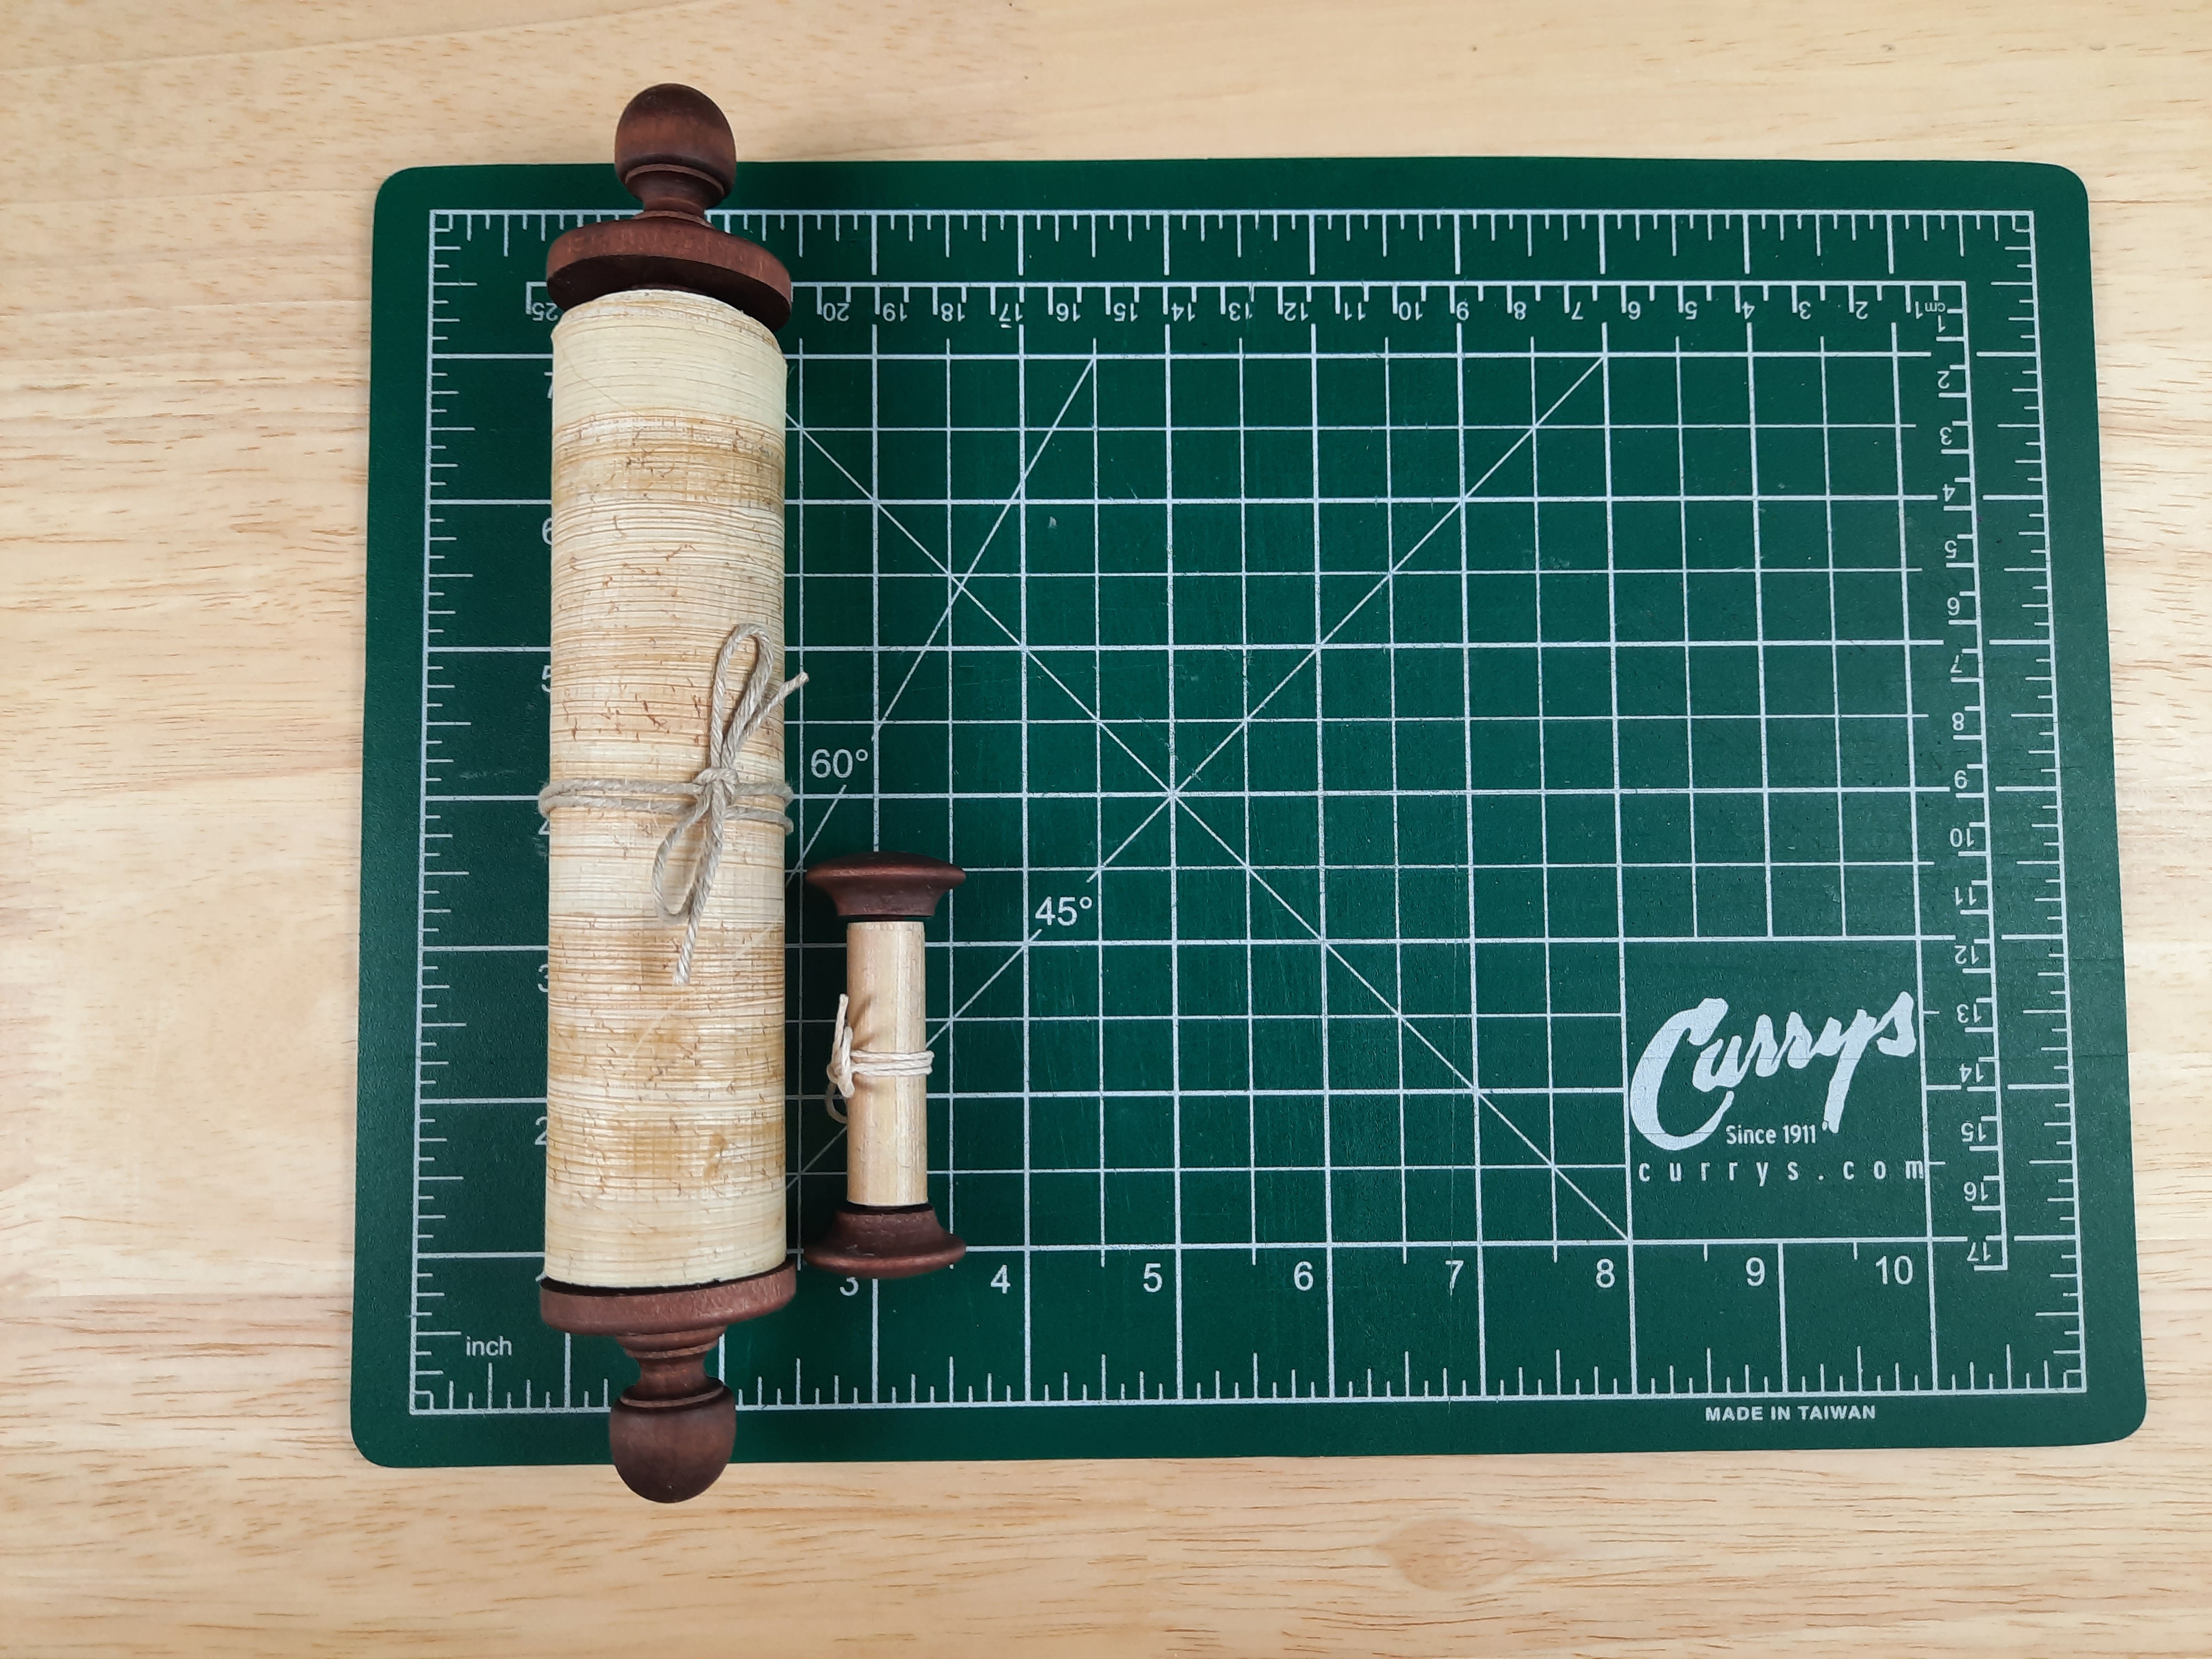
Our scrolls are made from papyrus and wood for the umbilicus, which is a stick used for unrolling (often unattached but ours is attached). The papyrus was cut into strips and pasted together. Where they are connected is called a kolleseis. Usually you could join the left side of the sheet over the right to form the kolleseis, while keeping in mind the verso and recto of the papyrus, — the recto being the side with the horizontal fibers and the verso the vertical fibers. The recto is the side that is written on, and is rolled on the inside. However, in our attempts to make the most of our papyrus, the recto ended up on the outside. But it still looks good! And I don’t intend to write on it.
Let’s take a look at some of the photos!
To start, we sanded and whittled the wood where appropriate and put it together before dyeing it.


Next we assembled the sheets of papyrus!
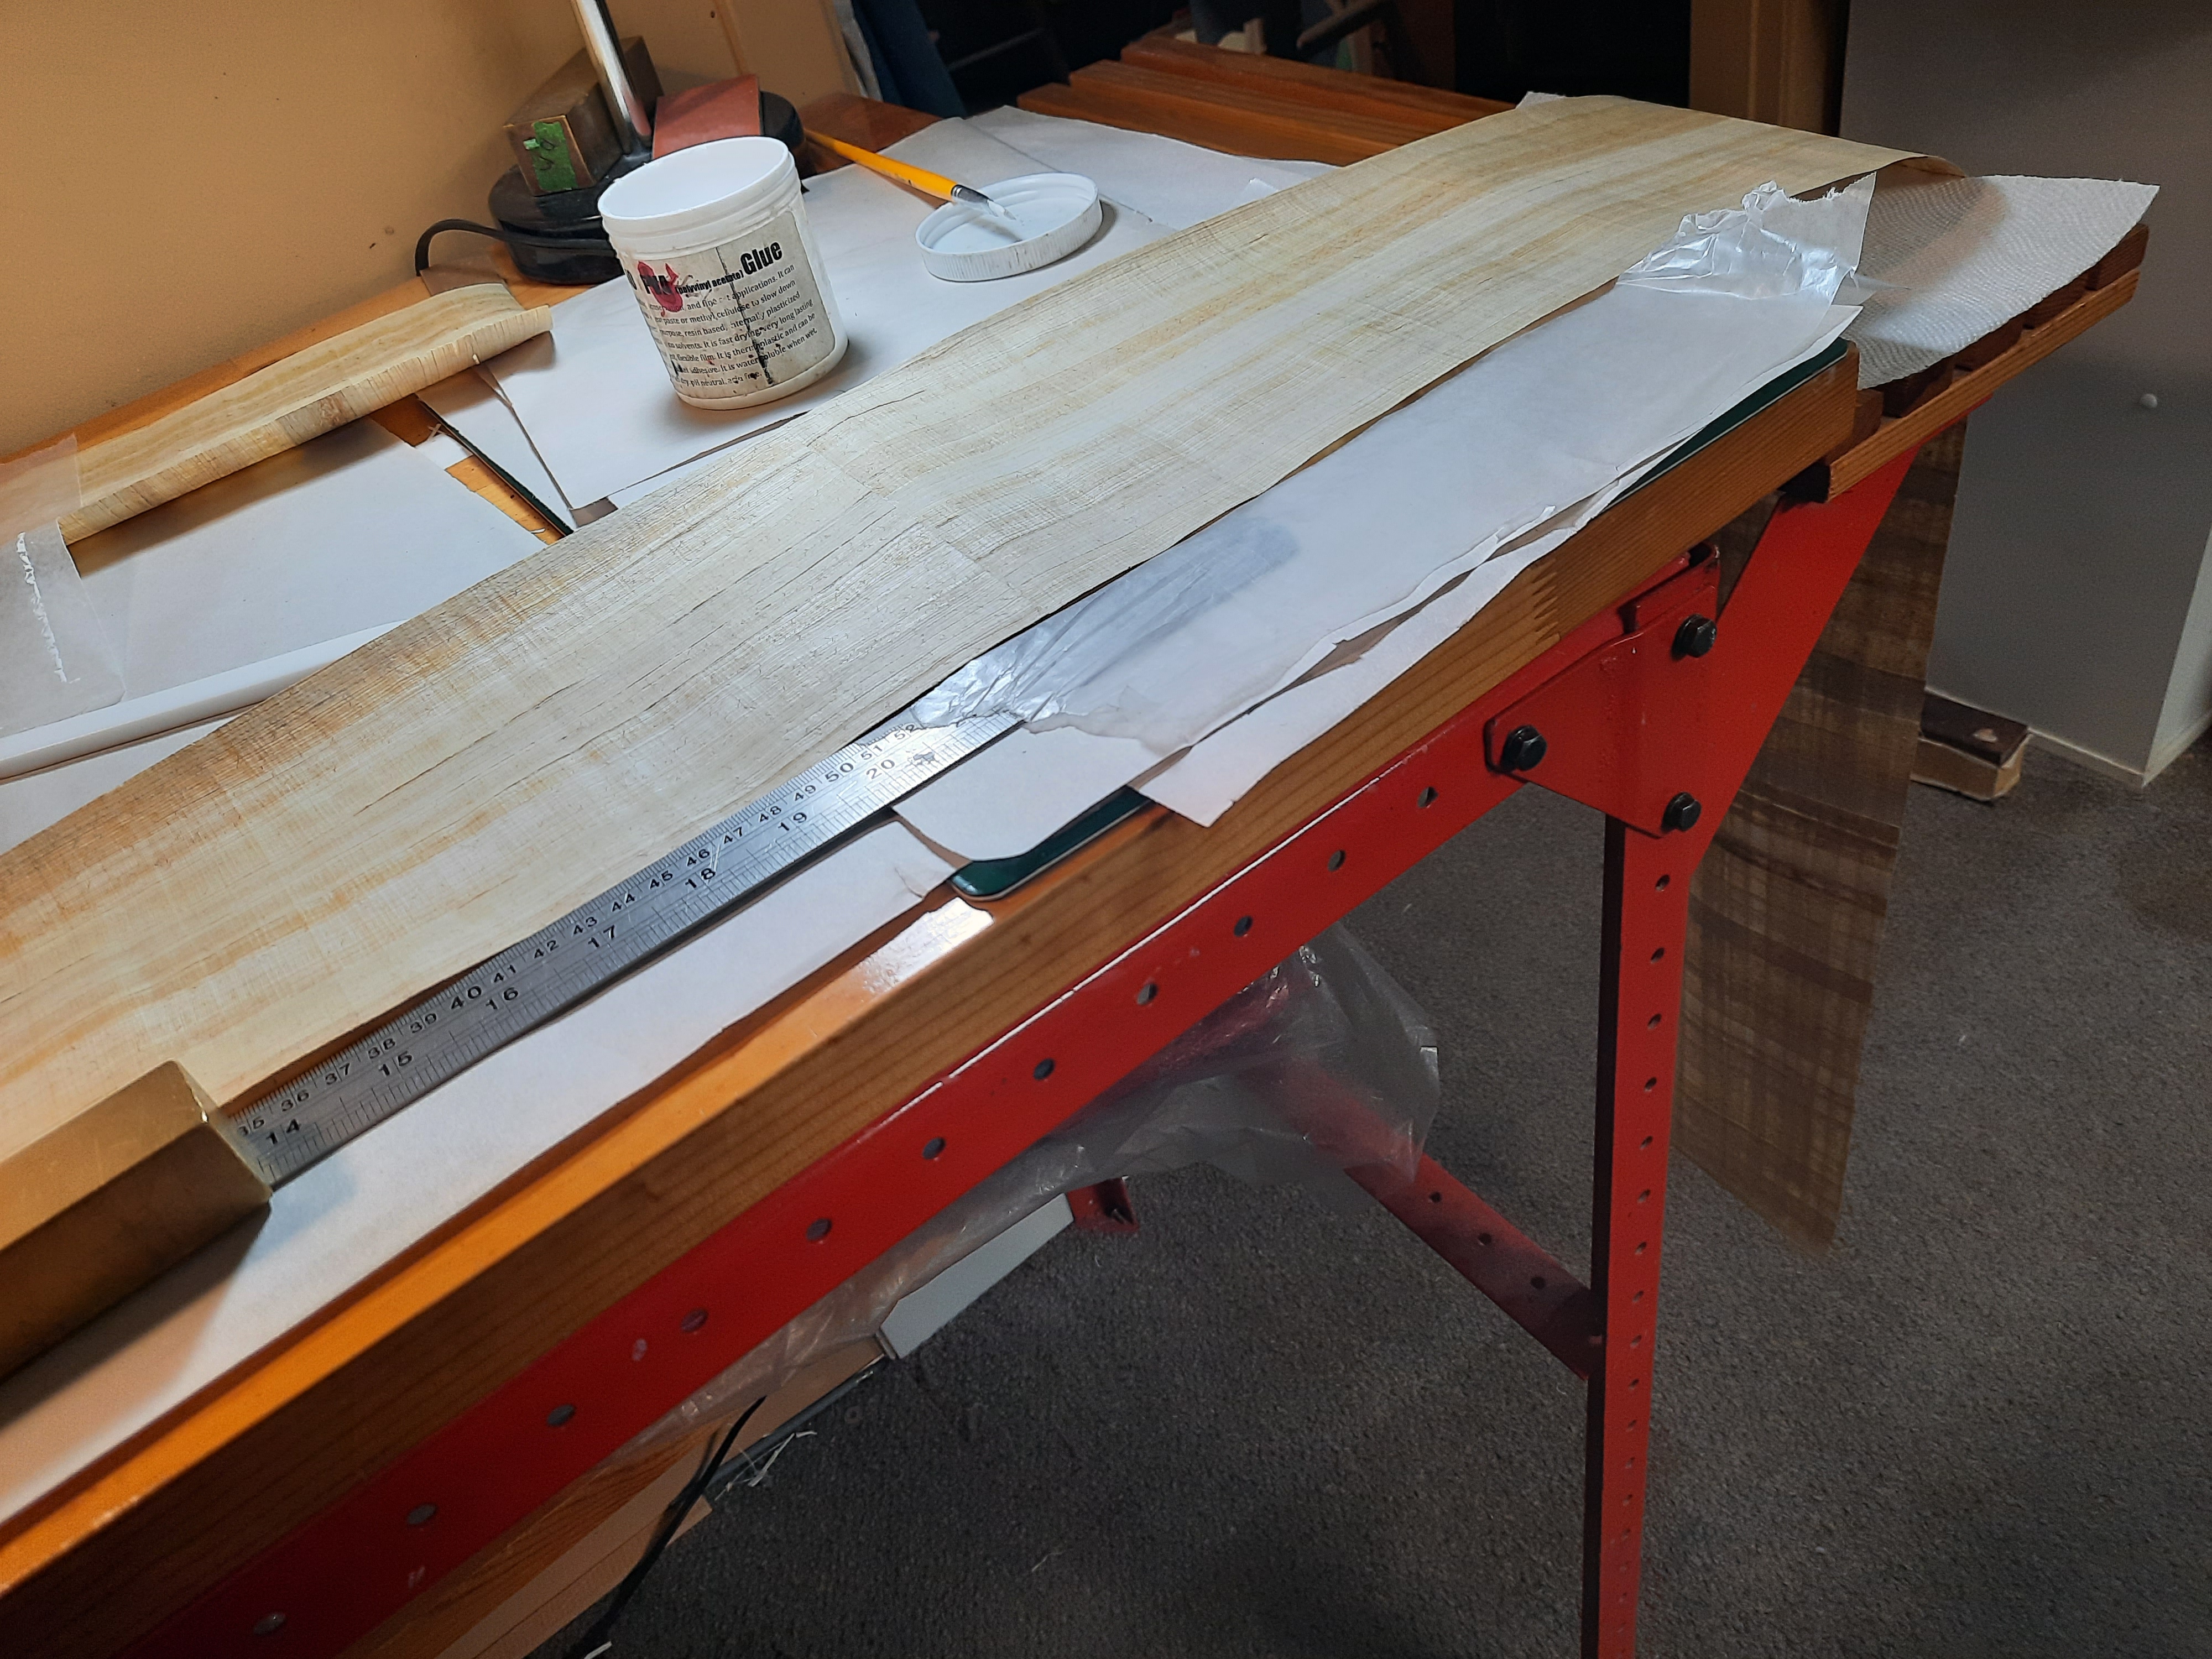
Once they were all together we attached one end to the wooden rod and rolled the papyrus up using a bit of hemp cord to keep it from unrolling.
Next up, it was time to make the tubes. This was a fun adventure! We started by wrapping a broom handle with wax paper, then pasted up a long strip of paper and wrapped it around the handle 5 times. This then had to dry.
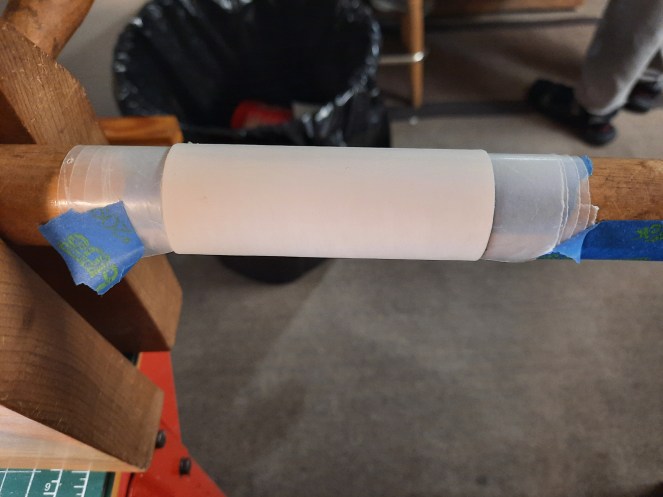
Once it is dry, another strip is added, flush to one side but shorter to form a lip where a lid will sit.

Finally the top is wrapped with more wax paper, and a lid is made by wrapping another strip of paper around the pole until it is flush with the tube’s thickness.
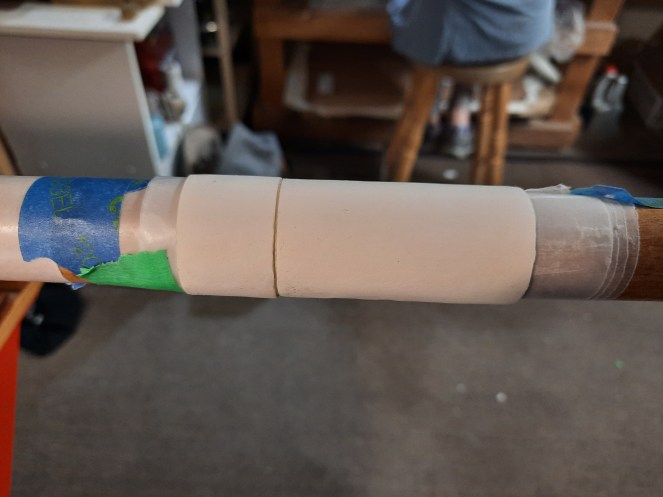
Once all of this is dry it can be removed from the pole. After that a circle of card is added to the top and bottom. We also added a layer of black paper inside to line the tube. Then we added leather. We made two types — a full leather tube, and a tube with leather at the head and tail. The half-leather tube was filled in with marbled paper.

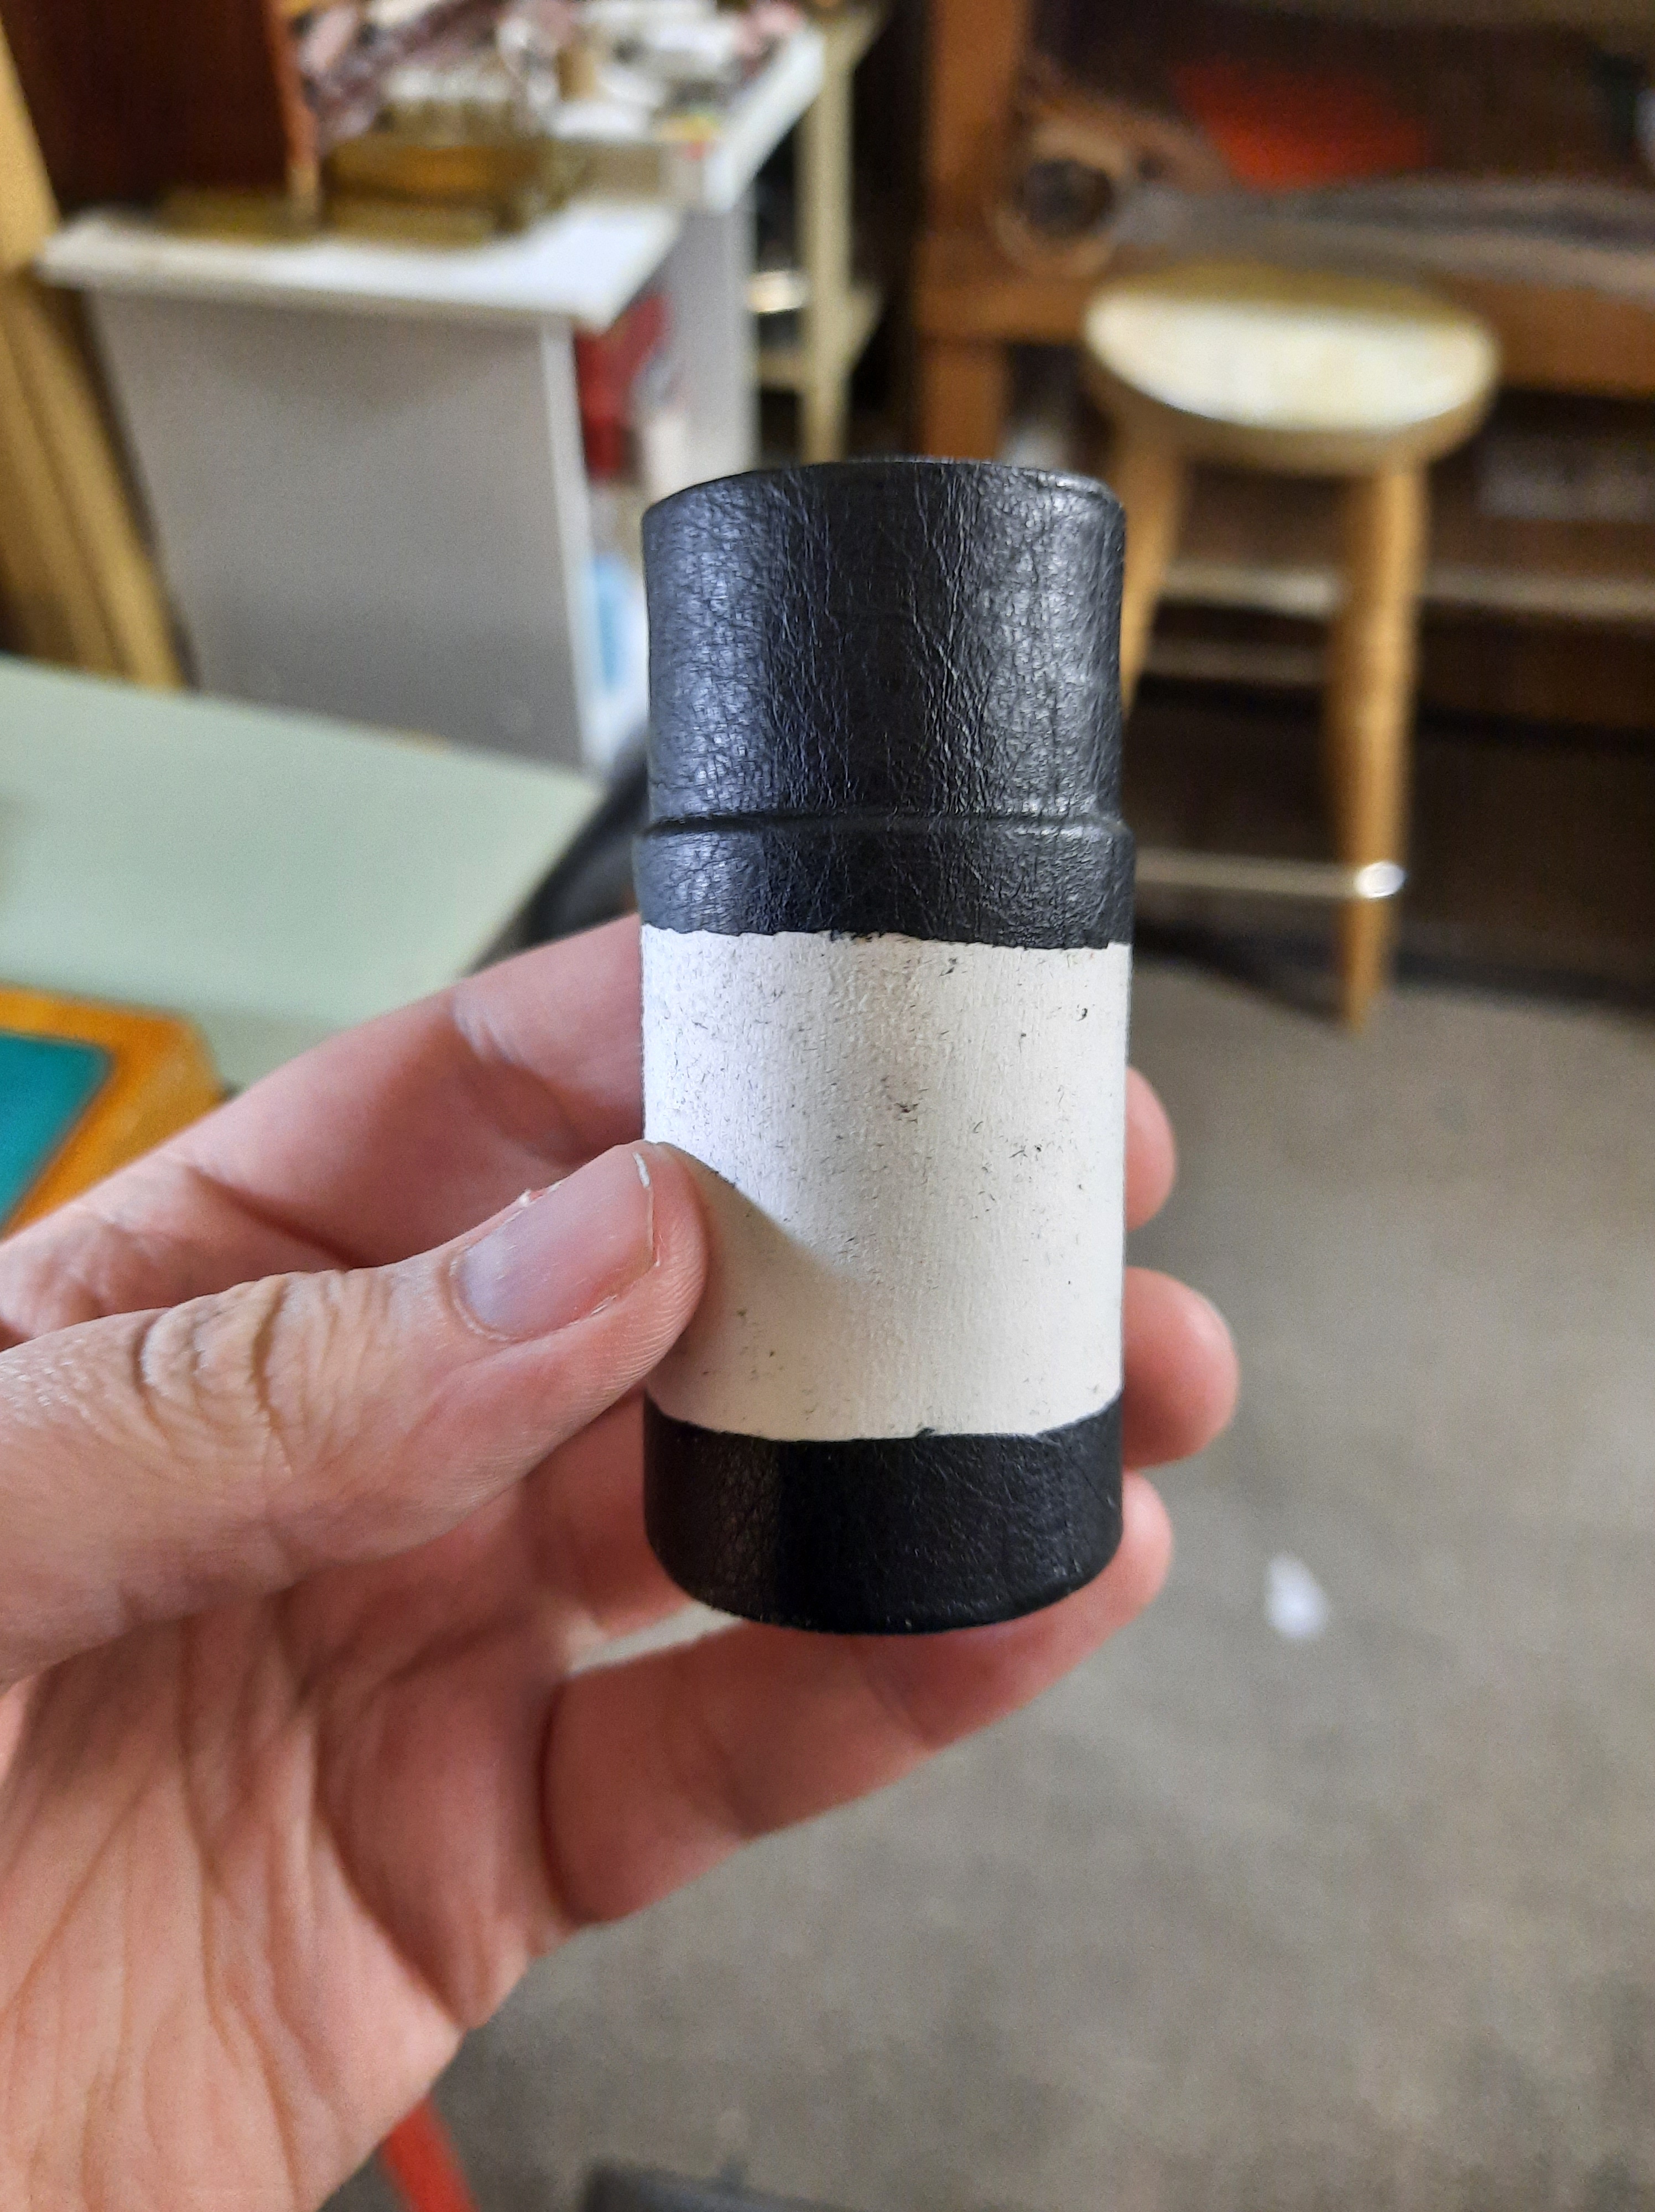
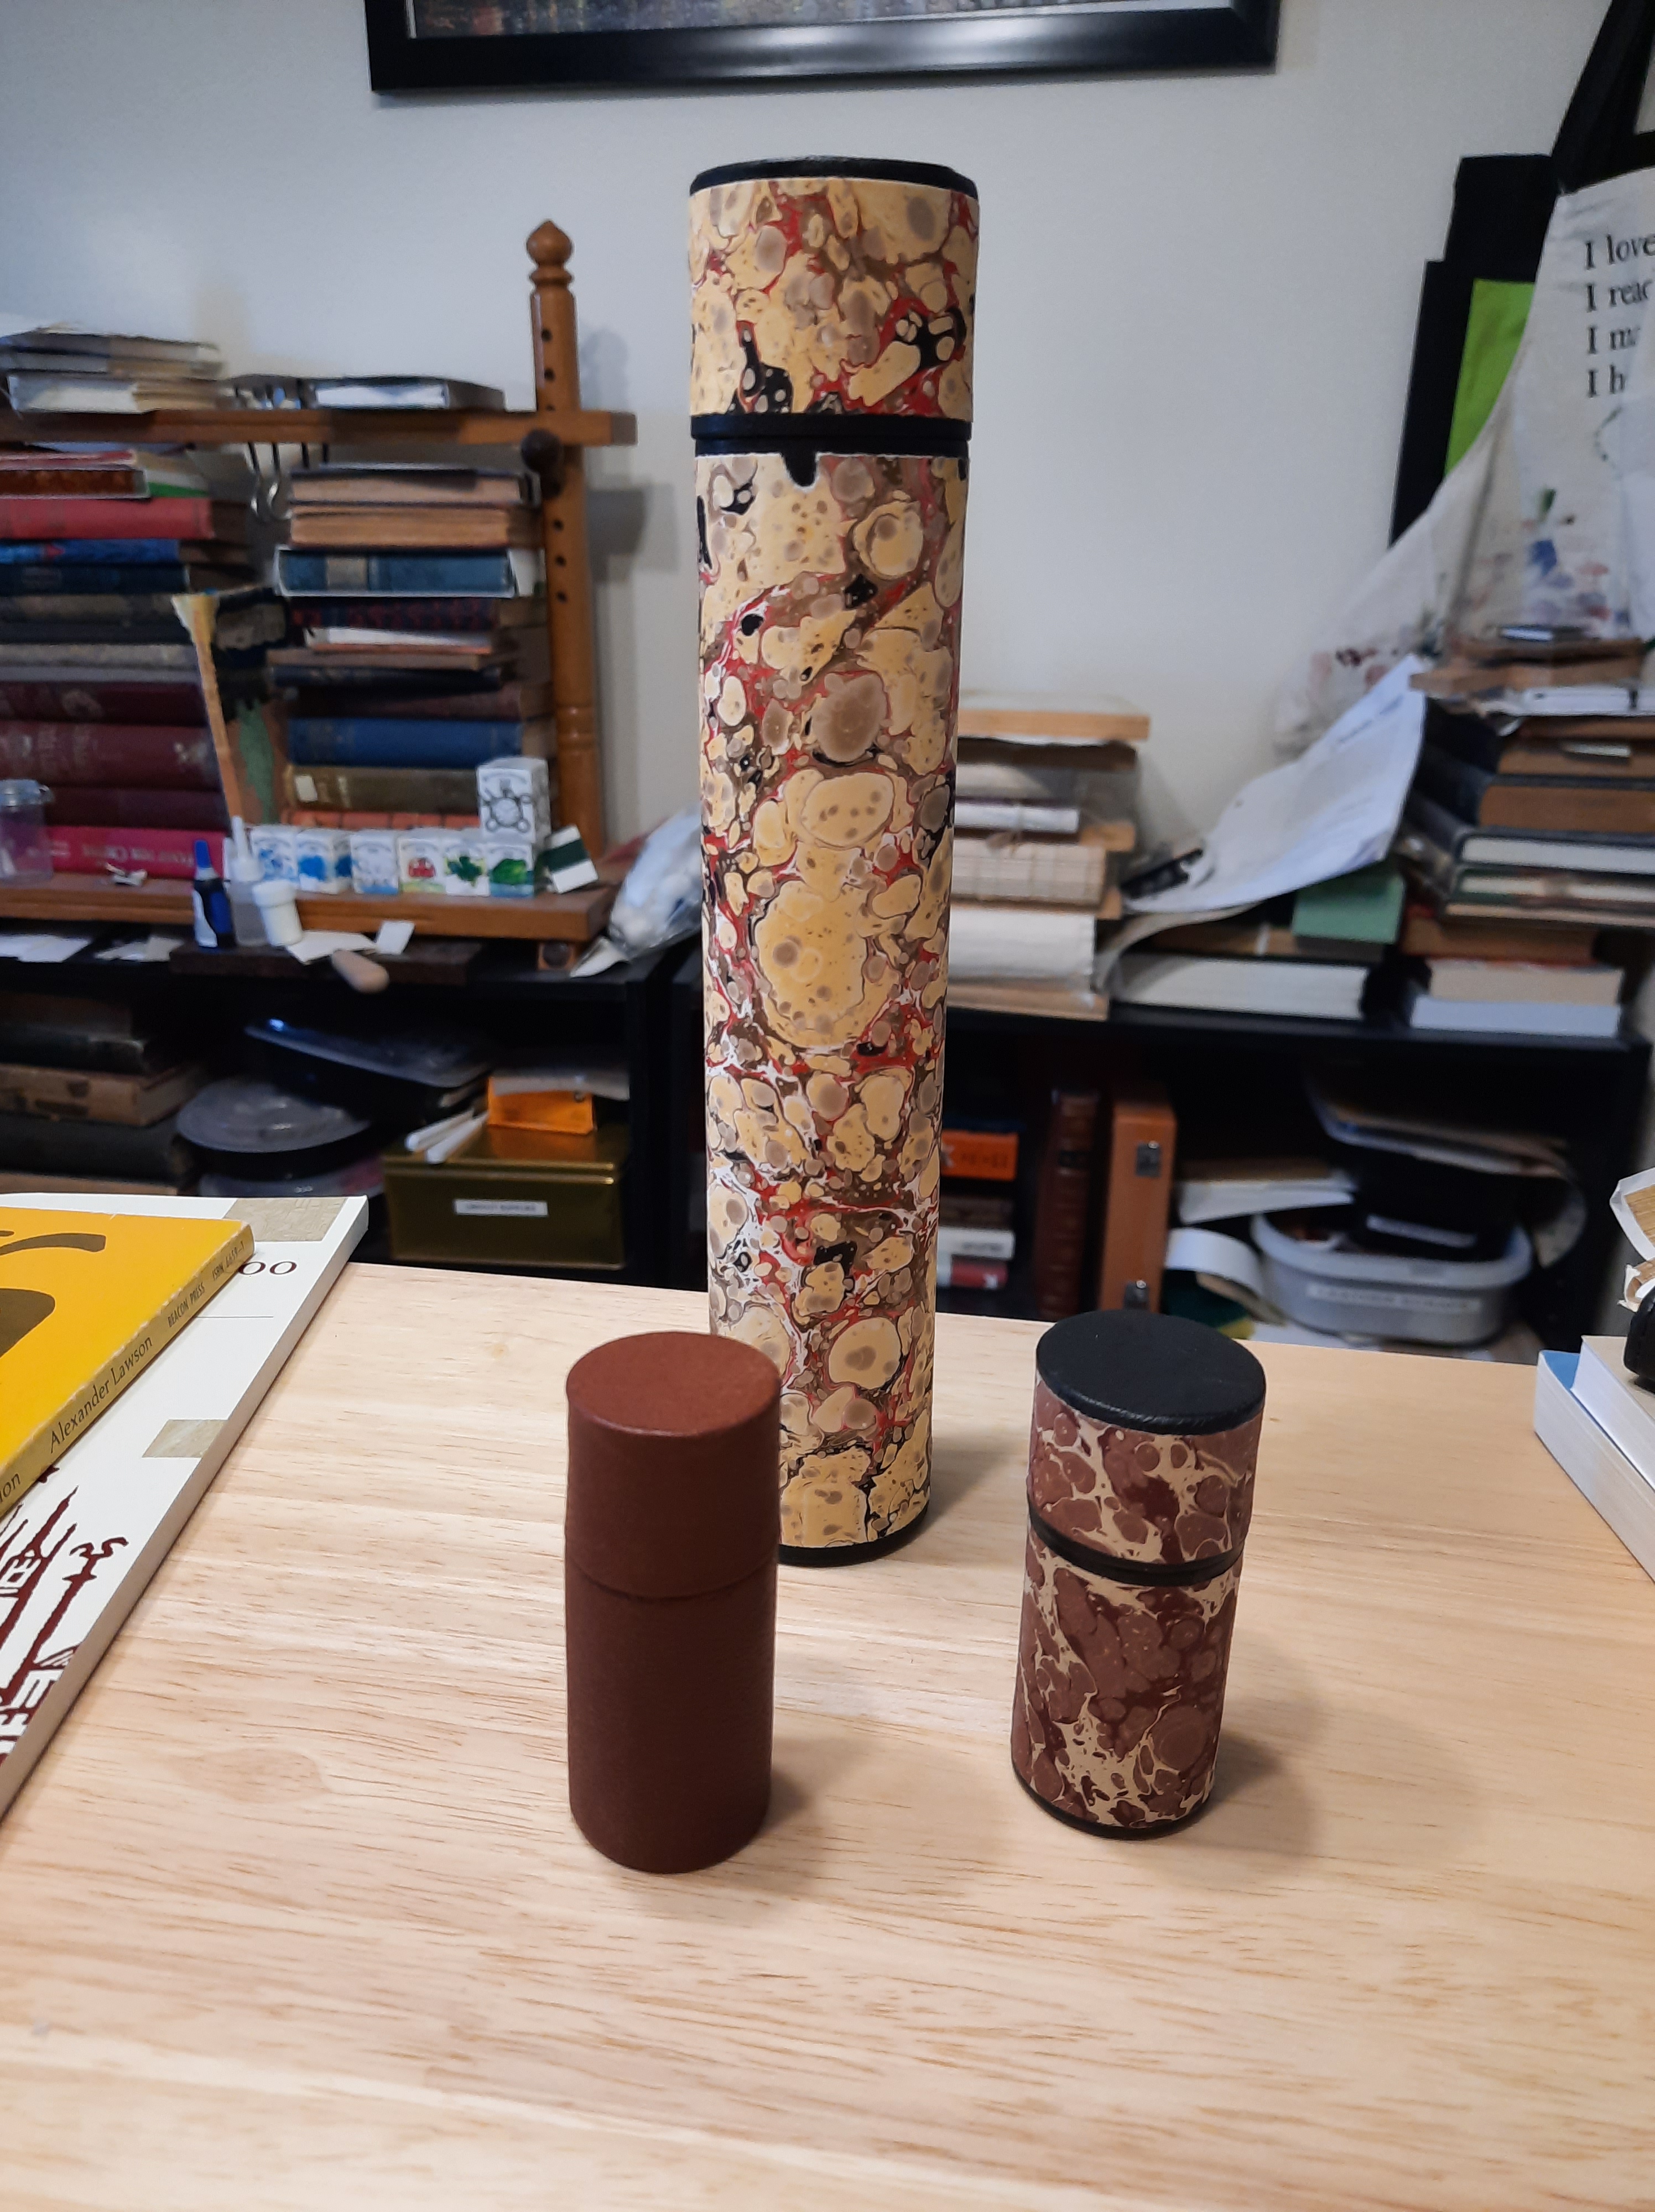
After they were finished, we waxed the rims and the lids to make sure they are smooth and easy to open and close, made sure our scrolls fit, and then we were done! I really like how the tubes turned out. I’ll link to my Instagram; I took a video of the pop that the tube makes when being opened. It has a nice good seal! (https://www.instagram.com/p/CSUV3sUAEcd/)
Here are pictures of the finished scrolls and tubes:


I am hoping to catch up with blog posts and get the fieldnote book up soon, and after that will be wax tablets! By the time this post is up I am sure we will have started working on the medieval books, starting with a Gothic binding.
Until next time!


How did you attach the papyrus to the wooden umbilicus? I’m making my own scroll example and am having difficulty finding historical information about how best to attach and my papyrus seems very stiff for simply gluing it to on.
LikeLike
Hi Mary, we used paste or PVA, I can’t quite remember! I think PVA would hold it better because it dries faster, but a mix of PVA and paste would work too. I also read that sometimes they weren’t attached (perhaps just wrapped very tightly around). Papyrus does have a grain (it will roll easier one way) so you might find that a different way of laying it on the umbilicus helps get it to lay against the rod better. In the end just be prepared to hold it against the rod until the glue starts to stick! 🙂
LikeLike