
After much persistence, level two of bookbinding was finally able to get off the ground! The courses require at least four people to run and often times scheduling can get in the way but we finally got it to work out and I was able to take level two during the first two weekends of November.
For those who don’t know CBBAG (Canadian Bookbinding and Book Arts Guild) offers several core courses needed in order to get a certificate. That is what I am currently working on! You can find more information about it here: http://www.cbbag.ca/home-study
Now, without further ado, I’ll show you a little of what level two involved. What I learned in level one can be found here: Bookbinding Level 1
Level two continues to work off of level one. We used a lot of the basics that we learned in level one. Day one saw us preparing text blocks and sewing. In level one we learned a historical link stitch and sewed over tape, in level two we sewed on recessed cords and flat cord. Below you can see the two types. For the book on the right we sawed grooves into the text block to lay the cord in and sew over it. The book on the left is similar to sewing over tape but instead of tape we sewed over flattened cord.


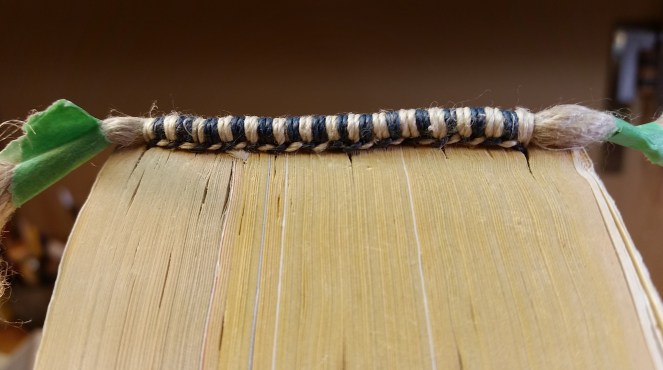
Day two we learned how to sew on end bands, in level one we had merely pasted end bands to the spine, in level two we learned how to hand sew them. We learned a two color variation and practiced on old telephone books, as seen below.
We also learned how to do rounding and backing, these two activities took us from day two, to day three. Below you can see the spine of my little book has been rounded.
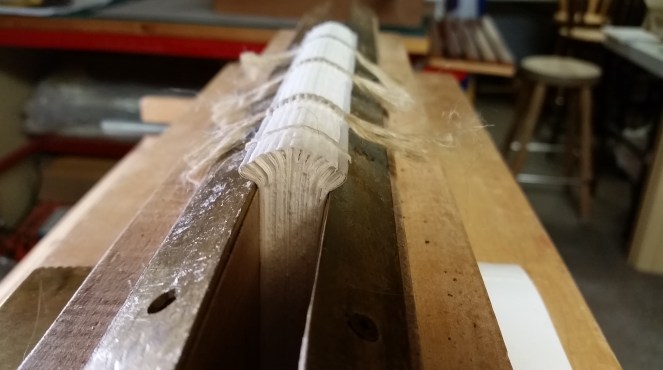
By the end of day three we had rounded and backed both books, ploughed the edges, sewed end bands and added edge treatment (speckled the edges with color).
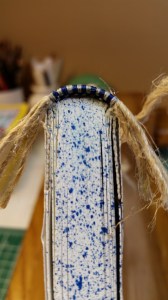
On day four we learned another style of end band – the conservation end band. This end band we did on our second book which didn’t get ploughed. As you can see the edges are rough rather than smooth.


On day four we also learned how to make a hollow tube, which was placed on the smaller book and used in the German case binding.
Day five we began to get the covers ready. The book in red is the smaller book – it is a German case binding with a hollow tube. The book with the blue end band is a German Bradel case binding. I’ll post a blog post with more information about that at some point!


On the last day we finished the cases, adding the covering paper. For the blue book we did invisible tips on the corners, rather then a cloth corners or a cloth fore edge like we had done in level one and with the red book.


Finally we’re done!
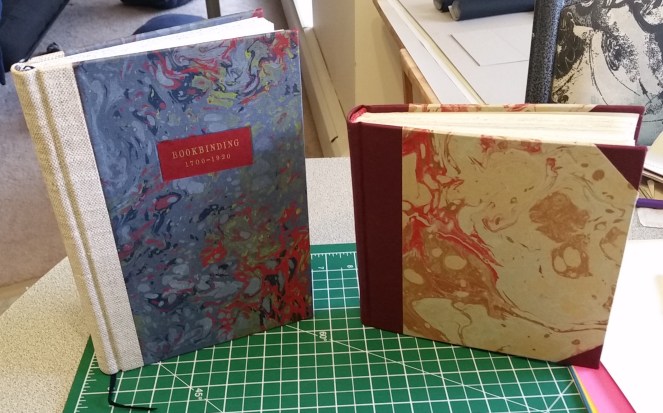
The blue book is an actual book: Bookbinding Materials And Techniques, 1700 1920 by Margaret Lock. The red book is blank.
I really enjoyed the course, as always it was a lot to learn and cover in six days. Dan provides a lot of information while he’s teaching. In January we have arranged for the first half of the restoration and repair course to happen – this is dealing with cloth and paper bindings. I’m excited to move on from making my own books to learning how to repair and restore books!
Until next time,


2 thoughts on “Bookbinding Level 2”