
Over the last few Saturdays of May, I’ve been taking an introductory workshop to linocut. This introductory course was getting us familiar with the process. By the end of the course we would design, carve, and print our own bookplate (or whatever we desired). I took this course through CBBAG with Dan Mezza.
What is linocut?
Linocut is a form of relief printing that uses linoleum as a printer block (a composite flooring material made from cork and linseed oil with a hessian backing). The smooth surface can be carved with V-shaped tools, there are gouges and knives made for this purpose. Water or oil based inks sit on the surface and are transferred to paper either by hand or by using a printing press.
Workshop:
Myself and two others made up the students of this workshop and we were guinea pigs for it. It’s been a while since it was taught so Dan wanted to run it with a small group first. We covered the basics. and then we got to start playing around with the different gouges for the lino cutter and just focused on trying to make different marks. We also covered what we’d need!
The tools needed:
- Lino cutter
- Linoleum (burlap backed), this comes in “battleship grey” and “soft-oluem” and you can also get wood or block backed.
- Ink: we were using speedball
- Press: the local CBBAG chapter has a “Baby Jane” table top, etching press
- Plexi/glass – for rolling out the ink on
- Brayer — “ink roller”
As mentioned, the first day we got started just by playing around and making marks on the lino and seeing what each tip did and trying them out.


We did a few proofs of our work, here is one of the designs I created on the first day, and the proof of it. A proof is when you ink it up and print it once to see what might need to be changed. Before proofing, while working on it you can do a charcoal rubbing but it’s not nearly as good as a proof print.


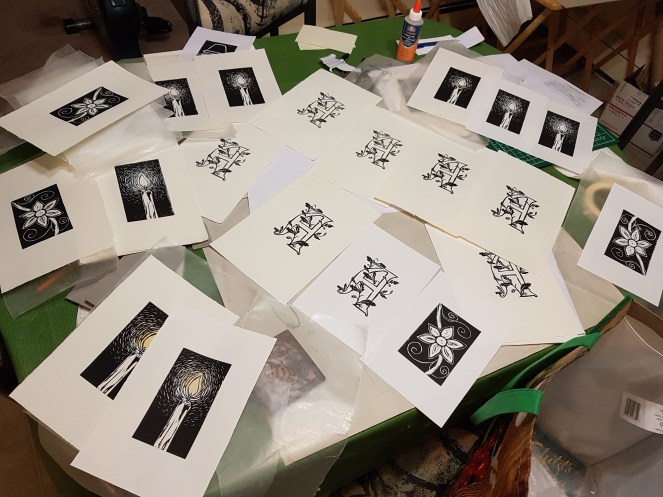
After that we continued to work on deciding what we would do for our final design. With the final design we’d do an edition of it. An edition is when you print several identical copies, number, title, and sign them.
For my final work I decided to do the letter A, and I decorated it with oak leaves and acorns. Here is the process:
First I designed what I wanted to do and used a light kozo paper to trace the design and put it backwards on the lino block — with letters they need to be cut out backwards so when you print them they are going the right away! Then I got to cutting the lino. I did a charcoal rubbing a few times before doing a proof.


Of course, while working on it I had someone keep me company — and prevent me from getting stuff done! Who can say no to such a face?!


After proofing it I had to go back several time to continue to clean it up and get little bits off here or there that were missed in order to make it look as nice and clean as possible. Below you can see the ink and brayer, and my lino all inked up and ready to print!


After it was inked up it was laid on the press. This is a Baby Jane press, you can see on the press bed that we have mapped out the size of the lino, and the size of the paper, this allows us to be sure we’ve positioned the lino and the paper in the same place each time we put it down to print.


And then I printed it, a number of times! Here is the final result:

I also made a candle, on which I tried a technique called “chine-collé”. This technique is printing on Japanese/Chinese paper, such as kozo. The kozo is pasted onto the thicker paper that we print on, and adds a layer of color beneath the print.

And that was the workshop! We didn’t get into colored inks because we wanted to avoid as much mess as possible, but perhaps I’ll give it a try at some point. I’d like to make more letters, maybe get the whole alphabet, and bind a small book with them. Until then I have a ton of As, candles, and a few flower prints.
I am off for vacation to New York City — so excited! The next workshop I take will either be one on paste papers or perhaps a repair course or finishing course! Whatever I take next I’m looking forward to it!
Until next time,

