
Whoa! Time flew by and as often as I kept reminding myself to write a blog post it just didn’t happen, before I knew it a month had passed since I last updated. Keeping busy, I have been applying for jobs and making a small stack of miniature book key chains on and off throughout the month! This blog post will show the process of making those little books.
Miniature Book Key-chains
I had previously made miniature books and attacked them to a clasp, this time I decided to turn them into key-chains.  The process was simple; first I began by cutting paper to size for the text block. I didn’t bother working with signatures for this project as I didn’t want to take the time to sew each miniature book. Instead I decided I would do perfecting binding, also know as adhesive binding. This binding is the same binding you’ll find on any modern paperback book you buy, the backs of all the single sheets of paper are glued together and that’s all there is to it!
After cutting all the paper I cut out end papers for each book, I used some scrap green and blue paper that I had.


Once the books had end paper I squared them all so that one side was completely flushed. This would be the side that becomes the spine. I then glued the spine and placed a small strip of mull along the back to keep the pages all together. For this I just used a PVA glue. Then I let them dry, for some time! This whole project took me a month but only because I would work on it in small chunks of time.


After I glued all the books it was time to start working on the covers!
For the covers, I used a cereal box (Cinnamon Toast Crunch! Yum!). I cut the cardboard into cover boards and spine stiffener strips. These were then glued together on a small strip of paper.


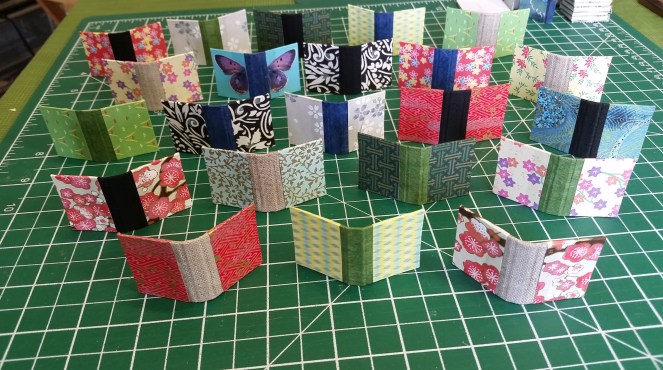
Once the covers were put together it was time to start decorating them! First I covered the spines. For this I used a variety of scraps that I had: green paper, blue paper, black book cloth and starched linen.

Once I made the covers I realized that the cloth was a little thick, and created a lip so I had to take a moment to add filling paper to the covers so that there wouldn’t be a noticeable bump on the covers where the cloth ended. Once they were filled in with paper I then decided on paper for the cover.
The paper I used for the cover was a small batch of origami paper that I have had forever! I never used it so I decided to put it to some good! I had a good variety of paper to work with.


Once the covers were all assembled it was time to attach the text blocks. These were simply hung in by their end pages. Somewhere in my calculation of cutting things, the covers and end pages weren’t lining up. Thus, I decided to first glue down a bit of colored paper onto the back of the covers to ensure it would all look nice, this way the end papers could be glued down without worry of accidentally leaving white space. If I glued the end pages down in attempts to cover all the white space it would have meant the books didn’t open properly. In short the covers were a bit too big and the end papers a bit too small, but I solved the problem; they look good and open fine! After the text blocks were in I fastened a key chain to the spine of the cover.
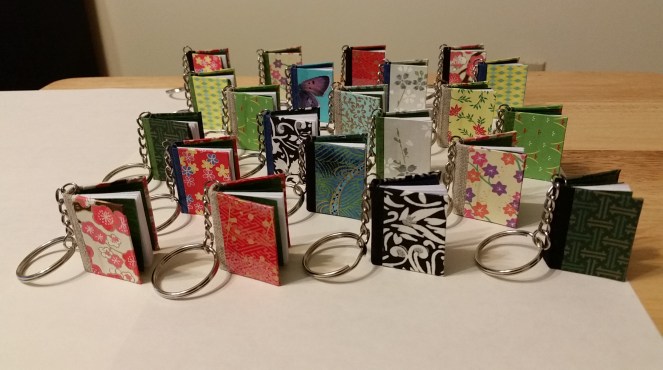
I’m currently holding a giveaway through my Facebook page (though it ends today) and one lucky winner will receive a free key-chain. More photos are available on Facebook of each key-chain separately, you can view the album here. I intend to sell these, and eventually make more, as well as making book earrings!
These books measure 1 1/4 inch in height and have roughly 20 pages in each of them.
Be sure to check out my Facebook, Twitter or Instagram page! I post regular updates and photos on all those social media channels!
Until next time,


Aww man I used to have these on my school bag as a kid! I think they were bright and sparkly and I probably tried to write in one at some point, but it was pretty much impossible. I like yours better actually, the ones I remember were always quite ‘thick’, in terms of number of pages.
LikeLiked by 1 person